beyond repair.jpgIt might have looked like an impossible repair....
-
Last edited by Ian Durrant; 4 May 2011, 21:16. -
And..............Originally posted by Ian Durrant View PostI only do what the voices in my wife’s head tell me to do! -
and I can't get inline pics to work......*again!*Comment
-
-
I know the feeling.Originally posted by Ian Durrant View Post I only do what the voices in my wife’s head tell me to do!
Comment
-
-
Havering-20110429-00039.jpgHavering-20110429-00041.jpg
and new outrigger (which was too long and had the wrong angle cut where it joins the main chassis rail, was modified and fitted, guess where it came from )
Last edited by Ian Durrant; 4 June 2011, 21:20.
)
Last edited by Ian Durrant; 4 June 2011, 21:20.Comment
-
I only do what the voices in my wife’s head tell me to do!Comment
-
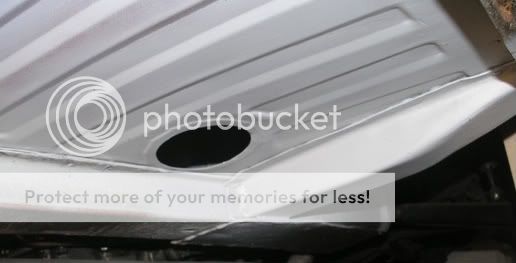
But it does leave me with a question. The new outriggers aren't shaped to the floorpan and no panel beating can correct it, so has everybody else just left a gap in the centre like on mine?Comment
-
 Thankyou, yes I am chuffed! I now feel I can tackle pretty much anything. Just the other side to do (which isn't so bad), the tricky A pillar repair, an offside three quarter wing, some other cosmetic bits and bobs and I can move on to paint and mechanicals. Though I'll be sorry when the welding is all done as I have really enjoyed it...... Might even have to buy something else thats rusty..........Originally posted by Jeff View Post
Comment
-
Well done Ian, its a credit to you! InspiringYellow Rules OKComment
-
Hi Ian
I have just done my floors and outriggers
I had my floor panel from Wards and it had the hole in the centre like the originals. I used these to get the welding clamps in place and pull the two together for welding up. I had pre drilled the floor panel and spot welded through to the outrigger flange much like the original. I also supported the outriggers from underneath with a trolley jack. This gave me a tight join between floor and outrigger.
It does take a fair about of panel work to get them to fit but the result was worth it.
As you have done yours and welded to the sills now, I would try a rivet through the floor and the outrigger flange to pull them together first on each side of the outrigger then drill through the floor to spot weld through to the flange.
I hope this helps mate,
Cheers
Glyn
Comment
-
Thankyou Andrew!Comment
-
Hi Glyn,Originally posted by XFSTag View Post
So did clamping it like that pull the floor down to the outrigger? I ask because I can't see how you can pull the outrigger up to the floor. I could have cut out the flange on each end of the outrigger but then i'd have lost the ability to plug weld the critical parts that give most stiffness to the joins at each end. also it would have moved the outrigger up and so it wouldn't have sat in the right place on the inner chassis member.
The original outriggers on mine look shaped to fit the shape of the floorpan, shame the repro's arent!Comment
-
Hi Ian
I did hammer a bit more shape into the top of mine on the bench before I welded them tbh. They were a bit longer than needed so I cut some slots into the ends and created a flange to weld them to the chassis. I hammered a shape into the top flange to fit the lip of the main chassis and marked up where the ridges were on the floor and hammered out this shape as best as possible too. This helps them fit.
But I still think you could pull them together with clamps etc.
I took a few pictures if they are of help
This was a trial fit when I drilled the floor section for the spots.

Then this is after welding up, now in primer
as I said I did clamp and use a trolley jack. I also used this to push the floor up to the bottom of the sill section and welded that through via another row of spot welds as well as on the vertical flange. I know it seems a bit belt and braces. The natural tendancy of the floor panel is to bow upwards when you start to install it so it does need pulling back into shape down onto the outrigger.
It's also worth using a PU body sealer on the joints to make sure it's all well sealed. I have done this along all the joints on the floor inside and out, and the outriggers.
You do need to hammer these replacement sections into shape as they are fairly "roughly" made imho.
Hope this helps mate, I am glad to be at the end of this now and have even ordered the carpets today. I am in the middle of painting eveything up at the mo.
All the best GlynComment
Comment