Well the seats have been re-trimmed and considering I’ve never done this before and I am by no means an upholsterer they don’t look bad. A few wrinkles but once the fabric has settled in a bit I think these will pull out
So to those of you who expressed an interest or those who are considering this job here are my top tips…. Professional upholsterers and perfectionist look away now!
Take lots of photos once you have removed seats from car
Only strip one seat at a time
Try and mark relevant reference points on the seat frame eg where different bits of join ajoin… I use a white tippex pen
Unless you are fed up with your relationship at home do not strip the foam in the house
Use a combination of heavy duty spray adhesive and evostick
Be careful of evostick on vinyl it can make it wrinkle badly
I hung my covers over the radiator before fitting… did consider the tumble dryer but chickened out
Your new covers will have a series of webbing strips used for pulling the cushion and back rest into a contoured shape from inside the seat. I found these too short whilst trying to stetch other parts and kept losing them. so I numbered mine from 1 to 10 extended them with cord and passed them through the slit in the foam, When they appear on the other side secure the string temporarily and place in correct order again.
Use a hair dryer for awkward bits
The diaphragm is a git to fit.you would swear it was too small or the hooks too short. Out of 10 hooks I only ever managed to locate 8. The last two holes were threaded with strong tie wraps located into the frame and ratcheted in.
I suffer from a bad back so I took the opportunity to insert a lumbar support made from a small roll of foam
Aldridge could not supply headrest foam only covers. You’ll find the headrest contain and inner foam bag which should be ok. Remove the disintegrated foam from inside and replace with hollwfill/dacron from an old pillow. Takes twice as much as you think but holds a good shape
Take the opportunity to grease your seat runner and seat height adjuster
Last to fit are the new back boards. Drilling 4 holes in them and hoping that they will line up with the original holes in the seat frame is having a laugh. You’ll almost certainly have to create new hole in the metal dtrip and its not that wide. I cut myself a 2" wide strip of MDF which I bent along its length and then inserted into the frame. Then drilled the backs and was guaranteed the screws would hit the timber and pull it in
Hope that’s of use to someone and not too anoraky … if you struggle I’d be glad to share my limited and amateurish knowledge with you
By the way the passenger seat cover wasn’t too bad apart from a couple of nicks its up for grabs if anyone wants it Beige trim code 74 I think.. just P&P
Would I do it again.... the jurys out but I'm keeping my day job
David
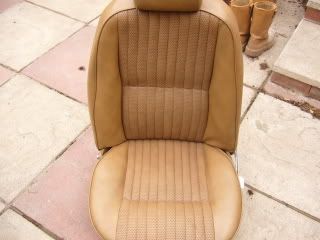
Old passenger seat
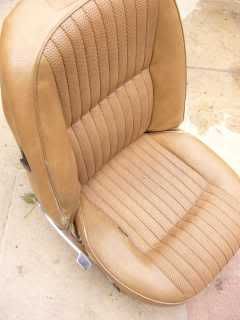
old driver side

webbing
Comment